Thursday 19 December 2013

Lion cubs and poppies - plus a FREE Santa Xmas card!


With the run up to Xmas, things have been hectic. I'm happily working away on some fantastic projects - so I thought I'd share a few illustrations with you to give you a look at what I've been doing!


I recently finished a series of illustrations for a book written by Marc Gawley

The book is a bright, fun, rhyming book for young children that will be available to personalise in a variety of names!


This illustration above was created as a sample for a new book - 
It was created in Adobe Photoshop, and the hair was created using custom brushes!

And this cute little girl is the newest addition to Evergreen Creation's Fairy Tale Trail series - you'll be seeing more of her soon!


And finally, I've created a colourful Santa gift card that you can use absolutely free!


Simply print out these 2 pictures below, at the same size, glue them together so the pictures face outwards, fold them in half and there you go! Your very own Santa card that you know nobody else will have this Xmas.

The pictures are best printed onto photo paper, and no bigger than 100%


Have a great Xmas and New Year!

If you like my illustrations, and would like a quote for a project of your own, you can visit my website at;


Or email me at;

izzybean@izzybean.co.uk


Sunday 24 November 2013

Izzy Bean's guide to self publishing your ebook - a breakdown!

I know it's been a while since I lasted made a blog post. I'm busy illustrating for some really great projects that I'll share with you all soon! In the meantime, I thought it might be handy to write a little bit about ebook publishing.

I know there's a lot to get your head around if you're new to ebooks and what everything means. In the last few years I'd say 80% of the books I illustrate are ebook only. We'll not get into why this is right now, but safe to say if you're thinking about writing or have written a book - you've thought about ebooks.

It's not as complicated as it first looks. And if you have a bit of know-how, you can do it on a very tight budget too. So what options do you have?

Well, you've written your script, you've commissioned an illustrator to provide some amazing illustrations ( Or are you looking for one? ) and you're ready to go! But where on earth do you start? Who is the cheapest? Who offers the most revenue from sales? Who takes the biggest cut? 

There are some big names out there in the self publishing world, and I've worked with most of them. Let's break down and compare the market leaders to see exactly what your options are.

Amazon Kindle Direct Publishing

One of the big-hitters, Amazon offer their very own publishing platform called Amazon Kindle Direct Publishing, or KDP for short.

Of course, the first thing to remember is Amazon have the power of the KINDLE - their own ebook reader which is highly popular and dominates the market. Publishing with Amazon will mean all those Kindle readers have access to your book - and that's a lot of people... 


- Amazon's ebook format is AZW, or .mobi - you'll have to convert your book into this format or pay someone else to do it. If you're looking to do this yourself, checkout Calibre or Mobi-pocket Creator

- Amazon offer a 70% royalty rate, with some rules which are listed on their website.

- The Kindle App is available on almost all devices, phones, PCs, Macs and Android. Even if your fans don't have a Kindle, they can still read Kindle books on other devices too.

- Amazon offers KDP select; a feature that, if eligible, can give you access to promotional tools whilst making your book part of the Kindle Owner lending library. In short, an annual fund will mean you get some of that money, but people can view your book for free for a limited time - getting you more reviews and fans. This also means you'll be exclusive to Kindle and so can't upload your book anywhere else.

- It's worth noting too, that some of the Kindles don't have full colour screens - so if you have beautiful illustrations make sure they look good in greyscale too!

iBooks author

ibooks author, if you didn't already guess is Apple's publishing software.

Books from the iBookstore are only readable on Apple's devices such as the iPad, iPhone, etc. However considering how many people own some sort of Apple device, this isn't a low number. 

- The ibooks author software is free to download and use, and comes with pre-made templates to make it easier to create your ebook (you can also use templates made by 3rd parties...)

- ibooks author offers the opportunity to do more with your ebook, such as make it interactive or add a soundtrack

- 70% royalty rate the same as Amazon

- Retain 100% of the rights to your ebook, but you have to 'register' and fill out an application which can take some time


Smashwords

Smashwords is an ebook distributor that lets you distribute your books to the largest ebook retailers.


- Smashwords is fast, free and easy. They take small royalties (you earn 85% of the net profit) but don't charge you for their service unless you sign up for their 'premium' service

- You can use their 'meat grinder' tool to do all the hard work for you, simply upload your word file and get your ebook in many different formats!

- You can sell on Smashwords itself as well as exporting to other sites, and Smashwords will take care of the distribution for you

Barnes & Noble Pub-it

Pub-it is Barnes & Noble's publishing service. Barnes and Noble are the creators of the Nook - a popular ebook reader. 


- Pub It offers a free conversion tool

- Work on a % without any upfront fees and get paid monthly rather than the 60 days Smashwords offer

- Your book will not only be available on the Nook, but also on the Barnes & Noble website - a very popular and well respected bookstore


Lulu

Lulu is a web-based self publishing service, 
which also boasts an online community including forums. 
Lulu, like other companies I've mentioned above, offer to publish and distribute your book 
for no charge - instead taking a percentage of royalties.


- Lulu has a store which gives you the option to order paperback printed copies of your book as well as the ebook version, although the high price of doing this to order means you likely won't sell many

- You will get 80% of the net profit and get paid monthly through Paypal

- Keep the copyright to all your work

- You can get a Lulu ISBN number for free - some of the above companies require you to buy this (ibooks)

- Can be listed on Amazon, although it does take some time for this to be processed

Createspace

Createspace, created by Amazon, is very similar to Lulu - but seemingly a lot cheaper. Not only do they offer book service but also CDs and DVDs too. They have both free and paid services. 


- Free to create and distribute your ebook, you only pay a % when you start seeing sales

- Can create paperback printed copies at a lower price than Lulu.com - you can proofs sent at a low price too

- Create Kindle ebooks

- Fast and easy to work with, but limited on choices of covers and spine art. You'd probably be best spending the money you've saved using Createspace in hiring a decent artist or designer to make your book stand out.

So, which one fits your requirements?

Only you can make that choice, but I hope this little guide helped somewhat to breaking down each companies' pros and cons in an easy to understand way.

There are, of course, other options out there. However I've listed the most popular and well known companies. 

Please leave a comment, share, like or follow me if you like what you've read!

You can visit my website, at www.izzybean.co.uk

Or my Facebook page! www.facebook.com/izzybeanart


Saturday 2 November 2013

EVERGREEN CREATIONS BOOKS; Thankyou to family farmers everywhere!

I've been illustrating for Aaron Burakoff for a while now, and every time he sends me a new script, I can't wait to see what fun illustrations I'll get to draw this time!

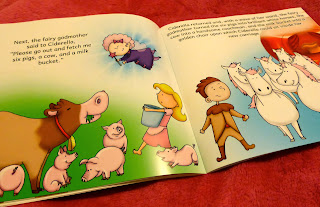
Aaron sent me some of the printed books (Written by Aaron Burakoff, illustrated by Izzy Bean) for the Fairy Tale Trail recently, and I just couldn't wait to show you all! Don't they look great?


The Fairy Tale Trail is a series of timeless fairy tales you know and love adapted to the agri-tourism industry to help teach children about farming in a fun way!

Each story features a different food and takes you on a magical journey to help understand where this food comes from and how it's made. 

There's important life lessons for kids, but also supports farmers and similar family-friendly venues.


The books are 10" by 10" - making them easy to read, hold and look at. They feel great, and the bright, bold colours are superb for getting the message across!


The books are available to buy over at the official Fairy Tale Trail website right here;


Or you can get them as ebooks too! 


And that's not all! The Fairy Tale Trail website features lots of activities for kids too, including colouring in sheets, word searches and more! Check it out here.


What's great about these stories is they can be applied to activities such as mazes and walk-throughs too - here's a few shots of the spreads up in the Corn Mazes, have you been yet?


Lacombe Corn maze sign
The Fairy Tale Trail is packed full of fun with a really important message about healthy eating, where our food comes from and more - be sure to follow their website for updates and more stories!


Thanks for reading, I can't wait for the next instalment, can you?


Friday 25 October 2013

Step by Step HALLOWEEN DRACULA VAMPIRE MONSTER! With Free colouring sheet for kids!

I've been posting these halloween guides all week, and today it's the turn of DRACULA!

All you need is a pen and paper - or a computer and mouse. It's not too difficult and it's easy to personalise if you want to be creative too!

And there's a FREE downloadable colouring sheet for kids at the bottom of this post!

DRAWING DRACULA - STEP BY STEP GUIDE

To start with, make a shape like this;

And another one, exactly opposite. They want to be as near symmetrical as possible, and the same size!

Then, draw this strange shape. This is the most difficult part, I promise!


And as before, draw it's mirror image opposite. All these shapes should connect and create one shape - the face!


Next, add this line and curve as above. Try to end it about 1/5th of the way down from the top, and in the centre of the face.


Do the same on the other side, making sure they meet in the middle!


Now we'll be adding ears. You can draw any shape ears you like, pointy ones work very well for Dracula. It's good to keep them symmetrical.


His nose, again, can be customised to create your own look, but pointy, long and thin are always a winner.


Next, we add the eyebrows. Have them meet in the middle, but not touching - you can leave a little gap. Arch them high in the middle for that menacing, evil effect!


At either side of the nose, draw small curves like this...


... then connect them with a menacing smile!


Add a little curve under that smile to give him a bottom lip!


Next, draw a long line downwards from the chin, and flick it outwards at the end.


Do the same on the other side too


Then, find where the very bottom of the nose is, and starting from the cheek besides it, draw a long curve, stopping at about the same length as his chin.


From this curve, draw another curve (not quite so curvy!) inwards, but stop before you get to his neck!

Apply the same to the other side, and you're nearly there!


Add two little beady eyes underneath those eyebrows you drew earlier. 


Now we can add some details to the inside of the ears... but wait! 
We're forgetting the most important bit!!


The fangs! Draw these nice and big, with sharp points on the end! 
He wouldn't be Dracula without them.


And there you have it! A sinister vampire cartoon of your very own!

Add some colour and share him with the world! Or me... at izzybeanillustrations@gmail.com


And as promised, here is a downloadable colouring in sheet for the kids, little and big! Just right click on this massive image below, 'SAVE AS' then print onto A4 paper.

See you next time!


Tuesday 22 October 2013

Step by Step HALLOWEEN FRANKENSTEIN MONSTER! With Free colouring sheet for kids!

Yesterday I posted a step by step guide to drawing your very own halloween bat, today, it's Frankenstein's monster!

If you missed the bat, you can find that here.

All you need is a pen and paper - or a computer and mouse. It's not too difficult and it's easy to personalise if you want to be creative too!

And for a FREE colouring sheet, scroll to the bottom of this post! (If you can afford to miss the drawing guide!)

DRAWING A FRANKENSTEIN'S MONSTER - STEP BY STEP GUIDE

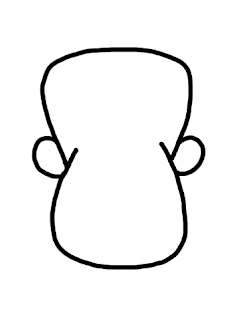
We begin with this shape;

It's not exactly a curve, nor is it square; but somewhere in-between. 

Next, the same shape, but upside down!

Make sure they're touching and the bottom one fits into the top.


At the point where these shapes cross, draw some bent circles peeking out. These will be the ears - so if you want big ears, make them bigger! I went for little ears.


Next add two lines coming from the very bottom of those ears. The lines should not be straight down, but widen outwards.


In the dead-center, between the ears, add a nose! I drew two small dots, then a circle connecting them. Leave out the bottom of the circle.

To add a chin, draw a semi-circle over the bottom of the face. You should erase the bottom of the face so that it looks like the picture above.

Now draw a ( bracket shape on the left of the face, and a ) bracket shape on the right.

Connect these brackets with a curve - and you have a smile!

An extra, smaller curve under the smile gives him a bottom lip.


Now for the hair - here you can use your imagination and make it as long, curly, spiky or wavy as you like!

We want an L shape on it's side to make the monster's spooky forehead


And the opposite on the other side - it's good to keep faces symmetrical!


Above each L shape you just drew, draw some eyebrows - these are slightly arched


Let's get up close and add some eyes! Two little dots right above the nostrils look great - but you can play around with placement and see what looks best!


We're getting close! But there are still some important things to add yet!

Draw a small 3 in the left ear (your left, not his!) and a E in the right ear.


Halfway down his neck, underneath his ears, draw a small rectangle like this...


... and then join that to the neck with two lines like this!


Once you do that on both sides... ta daa! Your monster is complete! Mary Shelley would be proud!

Add some colour, and share your creation with the world!


Thanks for reading, don't forget to watch this blog for more halloween how-tos all this week until the 31st!

As promised, below is the FREE colouring sheet for any little monsters who like to get messy this halloween. Simply right click the huge picture and 'SAVE AS' on your computer, then print the picture onto A4 paper!

And if you would like to share your monster, just email a picture to izzybeanillustrations@gmail.com

See you next time!