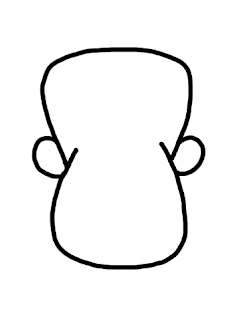
Yesterday I posted a step by step guide to drawing your very own halloween bat, today, it's Frankenstein's monster!
If you missed the bat, you can find that here.
All you need is a pen and paper - or a computer and mouse. It's not too difficult and it's easy to personalise if you want to be creative too!
And for a FREE colouring sheet, scroll to the bottom of this post! (If you can afford to miss the drawing guide!)
DRAWING A FRANKENSTEIN'S MONSTER - STEP BY STEP GUIDE
We begin with this shape;
It's not exactly a curve, nor is it square; but somewhere in-between.
Next, the same shape, but upside down!
Make sure they're touching and the bottom one fits into the top.
At the point where these shapes cross, draw some bent circles peeking out. These will be the ears - so if you want big ears, make them bigger! I went for little ears.
Next add two lines coming from the very bottom of those ears. The lines should not be straight down, but widen outwards.
In the dead-center, between the ears, add a nose! I drew two small dots, then a circle connecting them. Leave out the bottom of the circle.
To add a chin, draw a semi-circle over the bottom of the face. You should erase the bottom of the face so that it looks like the picture above.
Now draw a ( bracket shape on the left of the face, and a ) bracket shape on the right.
Connect these brackets with a curve - and you have a smile!
An extra, smaller curve under the smile gives him a bottom lip.
Now for the hair - here you can use your imagination and make it as long, curly, spiky or wavy as you like!
We want an L shape on it's side to make the monster's spooky forehead
And the opposite on the other side - it's good to keep faces symmetrical!
Above each L shape you just drew, draw some eyebrows - these are slightly arched
Let's get up close and add some eyes! Two little dots right above the nostrils look great - but you can play around with placement and see what looks best!
We're getting close! But there are still some important things to add yet!
Draw a small 3 in the left ear (your left, not his!) and a E in the right ear.
Halfway down his neck, underneath his ears, draw a small rectangle like this...
... and then join that to the neck with two lines like this!
Once you do that on both sides... ta daa! Your monster is complete! Mary Shelley would be proud!
Add some colour, and share your creation with the world!
Thanks for reading, don't forget to watch this blog for more halloween how-tos all this week until the 31st!
As promised, below is the FREE colouring sheet for any little monsters who like to get messy this halloween. Simply right click the huge picture and 'SAVE AS' on your computer, then print the picture onto A4 paper!
And if you would like to share your monster, just email a picture to izzybeanillustrations@gmail.com
See you next time!


No comments:
Post a Comment